Tuesday, May 29, 2012

Layers and Layers and Layers


From one of my online buddies, Barb, I found out about these cool digital frame effects that can transform your photos with just a few clicks of the mouse. The site is http://pixlr.com/express/  and it has many different textures you can add to your pictures. I have always wondered how Tim Holtz and others have made these grungy looking edges to their photos. I cannot afford Photoshop and this is a free alternative. Check it out!


 These She Art canvases are not projects that are quick finishes for me. I look at them and think, "Let me add one more layer of texture, stamps, paint or something." Then another layer and more staring at the canvas to see what else is missing.
I have a set of about 8 Tim Holtz Distress Markers and the other day I bought some additional markers at Michaels called Stamp Markers by American Crafts. The interesting thing about them is they look exactly like the TH markers, except for the text on the barrels of the markers. I am sure they are not the same formula of ink inside. I was looking for some more Distress Markers at the big box store, but they did not have any. I am getting hooked on being able to use a brush end marker to add details and additional color to my canvases. I even got some workable fixative spray so that I can seal the markers before adding more Mod Podge.
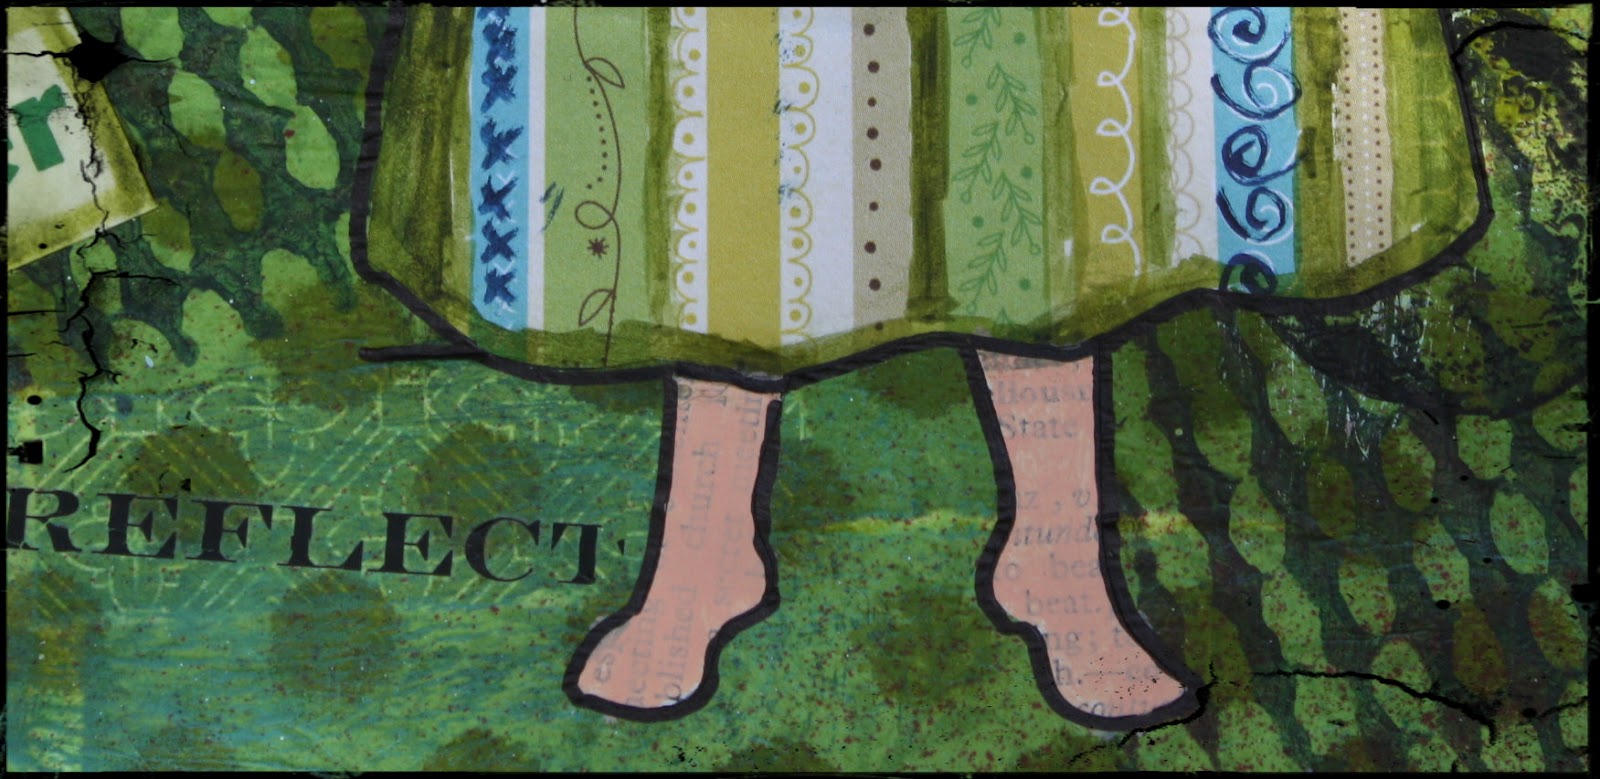
 This canvas features a dress made with layers of patterned scrapbook paper and highlighted with red acrylic paint. The flowers are paper ones that I Mod Podged down and then went over with some more paint and markers. I also used some old reading flash cards that were destined for the trash bin.


Here is the final version of this canvas. I redid the hairdo, added butterflies and hand wrote the sentiment, "Take wing and fly." It has so many layers of paper, paint and marker I cannot even count them.  I wish I had not hand written the words on it. I am never satisfied with my handwriting and once it's on there it's on for good.

Summer has finally started for me and I look forward to a long string of days in which my time is my own with no alarm clock ringing at 5 a.m. 
Happy Crafting!

Gale C. Lewis

Sunday, May 20, 2012

More She Art

I am still working through the She Art class videos at my own pace, making canvases as I go along.  The good thing about this class is you have access to the materials online for a year, so no deadline pressures.  (Lord knows, I have enough pressure with the high stakes testing taking place at my school these past few weeks.)


Here are two stages of a canvas that I have done some repairs on. I originally gave the girl a very unfortunate large blond bushy hairdo. It was kind of like Rosanne-Rosanna-Danna, only yellow. So this morning, I got out my exacto knife and cut several layers away from around her head to rid myself of the offending hairdo.  I like these braids much better.

I got some rubbery shelf liner and a mesh placemat at the Dollar Tree this week and have used both of them here to add texture.  I plan to add lots of paper butterflies to this canvas and some sort of sentiment to go with them.

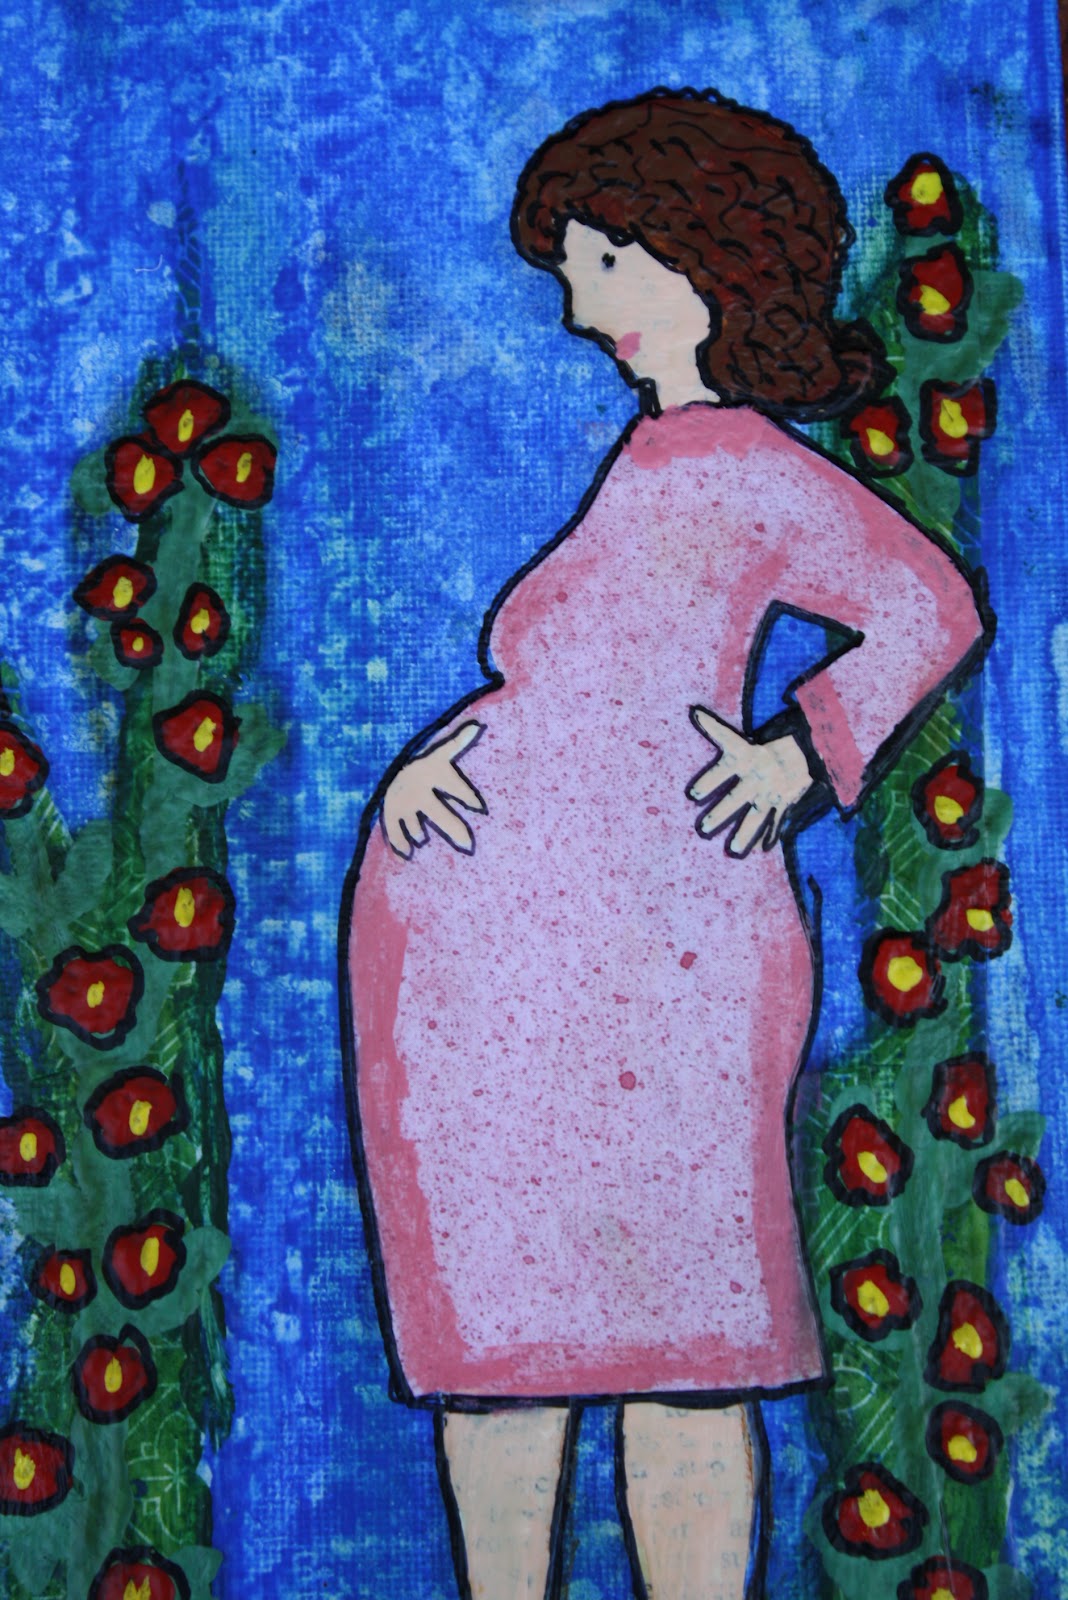
I did this canvas this weekend. Can you tell these are hollyhocks?  I am really pleased how this one came out. I did use my Silhouette machine to cut the dress and body parts. I just cannot cut this well by hand.


Tonight I started some new backgrounds. This is the step that seems to take the longest for me because you have to get it done before you can work on your next girl. There are lots of different materials here: origami papers, book paper, tissue paper, acrylic paints, Adirondack Colorwash Sprays, Mod Podge, an aluminum grill pan (as a template for the dots.) 

I wonder how many more layers these will take on before they are ready for the next girl I design? Well those butterflies are not cutting themselves. I am not cutting them using the Silhouette machine because I forgot to add registration marks when I printed it. Now it has to be cut by hand or wasted. I am too stingy with my printer ink to waste them, so hand cutting it will be.  Blurrrrggg!

One week then a few weeks of freedom before summer session!

Happy crafting!

Gale C. Lewis


Thursday, May 10, 2012

Cute Goat Girl

 Still working on my She Art class by Christy Tomlinson and I have veered from the directions (as usual) to make it my own.  She does not tell how to make mermaids and goat girls, but I am using her directions and adapting them to my ideas.

This canvas started with a picture from an animal magazine of this little goat (or deer maybe) with the largest eyes and longest eyelashes. I knew right away that I wanted to make her into a girl.

This week in the class I am learning about how to make the dresses more detailed and interesting. I used strips of the blue paper to make the dress look pleated. I added a belt and then embellished the dress with scraps of lace. The hairbow is made from the same paper as the dress.

The background of this 5x7 foam core board was made with tissue paper over which I glued strips of blue and green papers. I added some green glitter glue and blue paint. Once all that was dry, I stamped on the rectangles and the circle using acrylic paint and old wooden blocks.

For the sentiment, I used my Tim Holtz Chitchat stickers and doodled around them with a black Sharpie. Let me tell you, doodling over dried glitter glue is not easy.

One of the hardest things for me about this class is adding the doodles and embellishments and not worrying if they do not look perfect. I am not skilled at sketching and I know that shows in my doodling.

I have already given this one away to my friend Heather.

I am only halfway through the Week 2 videos and there is still another week to go after that.  I am learning so much!

Happy Crafting!

Gale C. Lewis


Tuesday, May 8, 2012

She Reached for the Stars Canvas

 This is the first She Art Canvas with lots of doodling and other details added. I used some Distress Markers on the sunburst and to outline the words below.
 I thought this was an appropriate sentiment for my first She Art canvas. I am trying out an online art class and this is the first girl for me. 
 My new 8x10 canvas-- in love with it.  I used green and blue tissue paper for the background and inked over it with Distress Ink pads. The body and dress were cut on my Silhouette Cameo from various papers, including dictionary paper. I painted over the dress and then colored on some designs with Distress Markers.  I got the idea to have her reaching above her for the stars. The stars were painted with a template cut from cardstock in both purple and yellow. Then I traced them in black Sharpie to help define the shape.

The trickiest part here was deciding how to paint just the back of her head. I think I still need to add a layer of paint around the neckline.  I love the shape of this dress way more than the boxy dress I made on the first canvas. It was astoundingly easy to cut from a paper doll template!
 I stamped the bird with Staz-on ink and then added doodles such as the music notes and squiggles with my Sharpie. See the border along the edge of her dress?  I love how that turned out.
Here is the big lug-- Kippy. He was intently watching me take photos of the artwork, and I could not resist taking a few of him. Of course, he would not keep still, so his picture is off center.

Here's to trying something new and reaching for the stars!
Gale C. Lewis

Sunday, May 6, 2012

Mermaid She Art

Still working on my Christy Tomlinson class-- She Art.  Yesterday I spent some time cutting art doll parts with an electronic cutting machine. It was the first time I had used book pages in it and of course it cut like butter. The problem is that my cutting mat is already almost worn out and I am having to use tape to hold the papers in place.  I made some larger head templates and found some clothing patterns that I can cut using printed scrapbook papers.


For this mermaid I used an 8x10 canvas that I had already covered in Fluevog blue tissue paper and some Distress Inks. I decided to repurpose the canvas for a She Art project, so I added some more designs with acrylic paint.

I used a circular piece of foam pipe insulation to make the circles of orange paint. Both white and orange paint was added using a craft brayer.

The mermaid was cut using an art doll template and my Silhouette Cameo. I cut her upper body from dictionary paper and the bottom portion is scrapbook paper. I Mod Podged them down to the background and then painted over them with acrylic paints. I added hair with more paint.

I added some seashells cut from fancy luncheon napkins in sort of a heap near the bottom of the canvas. They really blend into the blue background.

I will add more details when she's good and dry. I do not have the special ink pen the instructor uses and my Sharpie will not work on damp surfaces.  I need to find a white paint pen, too.

I am having lots of fun making these. More are on the way.

Gale C. Lewis

Friday, May 4, 2012

She Art Class by Christy Tomlinson

 I am taking an online art course for the first time. The course is an older one by Christy Tomlinson called She Art. There are lots of videos to watch and directions for creating the ladies from paper, paint, and other media. This is my background board which I covered with papers and tissue tape.  They are Mod Podged onto an 8x10 canvas board.

After allowing all the glue to dry, I added texture and interest to the background using acrylic paint and stamps.  This is the hardest part for me. Figuring out what makes the background interesting versus what makes it look messy is tricky to me. Christy T. says not to worry about making it look perfect, just gets lots of little details on the canvas.

Here is my first girl minus the details and sketching which are supposed to go on top of the paper and painting. Love the hairdo, which I was most concerned about getting right. Also, I will definitely play around more with the dress shapes in the future. (I am going to want my girls to be snappy dressers!)

She is not finished yet, but I am happy with her progress so far.

Gale C. Lewis

Sunday, March 18, 2012

Spring Colors


I used Ranger Alcohol inks to create this plaid pattern on glossy cardstock. This is a Tim Holtz technique. Over the plaid pattern I stamped butterflies with Seedless Preserves Distress Ink. Later I used some purple glitter glue over the stamped images for extra sparkle.


Another plaid tag, this time featuring one of the Tim Holtz bunny die cuts. The butterflies are ones cut on my Silhouette Cameo. The stamp is one of Tim Holtz's (which I cut apart so I could stamp the words individually.)
Here are the alcohol ink plaid tags I made using Tim Holtz's technique.  All the tags are cut using my Cameo from the back page of a scrapbook paper pad. That was the only glossy cardstock I had on hand.

This set of #8 manila tags was created with book pages from a cast off book. I applied Mod Podge unevenly to the tags and glued them onto a book page. Once dry I ripped the excess portion of the book page off, leaving ragged edges and uneven coverage.

Over this surface I stamped designs using a variety of stamps by Tim Holtz and LaBlanche. I chose a spring palette of colors using Distress Ink pads, among them Seedless Preserves, Peeled Paint, Spiced Marmalade, Mustard Seed, and Scattered Straw.  The black ink is Versafine permanent ink.
The inks around the edges are applied with a damp makeup sponge. It is interesting to me how the Mod Podge resists some the ink from being absorbed into the paper and causes variations in tones.

Happy Crafting!

Gale

Thursday, March 8, 2012

New Toy!


Here is the first cut I made using my new Silhouette Cameo machine, assorted butterfly shapes cut from a sheet of 12x12 scrapbook paper. (It did cut the antenae perfectly, but they were so tiny they just tore off when I removed them from the sheet.)

For a while now I have been researching and pondering if I should get an electronic cutting machine for my paper crafts.  I downloaded a couple of versions of software to play around with, read countless reviews, watched Youtube videos demonstrating these machines and finally came to the decision that the new Silhouette Cameo was the right option for me. 

For about a month before I purchased it, I worked on learning to use the software to design projects so that when it arrived I would be ready to use it. I am so glad I prepared ahead of time!  It was wonderful to be able to pull it out of the box, plug it in and start making things. There is a learning curve to be able to use the software to trace images from my computer and to adjust the cutting lines-- I am still working on certain kinds of images that need interior cuts as well as the outline.

 This is a free calendar project from the Silhouette store blog.  Each week they give away a file. I used the March calendar grid to make these 6x6 pages. I created the shamrock border by finding a clip art image, replicating it in the Silhouette Studio program and welding the shapes together.  The background square and the rectangle of coordinating papers were also cut using the machine.

 I grunged these up using Tim Holtz distress inks in Pine Needles and Peeled Paint. I love how these turned out and I am madly thinking of new things to make using this wonderful tool.

Edited:  I am adding this to a linky party so you can see how some others have used the free shapes from Silhouette. The link up is sponsored by Maggie Mullins' blog.
I used the shape jan-april calendar C03093.

Happy Crafting!
Gale

Saturday, January 28, 2012

Organizing and Paint Chip Art


I found some 3/4 inch white circle stickers at the office supply section of a local store and used them to label the tops of my Distress Stains.  First I tried to color the labels and then adhere them to the tops, that did not work out. So then I put the sticker on the lid first and then colored it with the dabber top.  Came out great!

Here is my Tim Holtz Cargo Case. I love this box for storing my distress ink pads and my bottles of distress stain. It has clips on all sides to ensure that it closes securely.


To keep track of how many colors of distress stain I already have, I downloaded this chart from Ranger. I resized it to standard letter size paper and printed it on cardstock. Then I dabbed each color I own in the appropriate box. Now I can make sure there is no double buying of colors.
I made this canvas board using paint chips, a Marvy heart punch borrowed from a coworker and ModPodge. I cut out the heart shapes alternating direction on each strip. In order to make them fit my 8x10 canvas board I had to cut off one color from each strip. 

I laid out the strips so that the colors did not overlap and used ModPodge to glue them down. Afterwards I went back and placed the hearts in the empty holes more or less with random placement. More ModPodge and I left it to dry overnight. This is the shiny ModPodge and the photo does show a little glare. I am happy with how it turned out. 

Happy Weekend!
Gale 

Sunday, January 22, 2012

Altered Page Art


The deer is printed on a dictionary page featuring the definition of the word deer. I am now on the lookout for more old dictionaries to tear up.


These are printed on pages from a vintage music instruction book. It was falling to pieces at the Salvation Army where I purchased it. In fact it was in several sections that had fallen out of the binding. I trimmed them up and look how great they turned out when printed with these silhouettes.
I am planning to mat these and frame them for sale. From an idea I saw on Etsy. This cornet is a free vintage image from Graphics Fairy.


Two of my nearly finished Valentine swap pages. I added a banner and paper to the backside (which is not shown here.)

Monday, January 16, 2012

ATT Valentine 6x6 Swap

One of my Yahoo groups, All Things Tim, is having an altered art swap with a Valentine theme. The requirements are to make 10 copies of a 6x6 inch page using Tim Holtz supplies and techniques. Most people make the same page 10 times, I make 10 similar pages but not identical. We mail these to a swap host who sorts out all the pages she receives and mails back to us 10 different pages created by 10 different creative folks.

The last time I participated in this type of swap was for a Halloween themed project in which I took an old photograph and altered it. I loved how my page came out and the pages I received in return were stunning in their detail and creativity. 

My Valentine project took many steps to create.  I chose a patterned cardstock for the background and wanted to emboss it with the TH Rays texture fade folder. That did not work out the way I wanted it to, so instead I cut some fun foam into a stamp. I embossed the foam in the texture fade folder, cut out the design with scissors and adhered it to an acrylic block for stamping. I stamped the rays design so that it overlapped slightly in the center and had rays emanating all around.


Some of the pages include printed scrapbook paper as a border. Then I added additional color using Adirondack Colorwash Sprays, Perfect Pearl spray and some distress stains.

Over this I stamped Tim Holtz's angel wings with embossing ink and heat embossed with black powder. I wanted the wings in the center over which I would place the heart I made.

I cut hearts from paint chip sample cards (using my Sizzix and the wonky hearts die) and heat embossed a design in the center. These were adhered with foam tape for some dimension. Using some glitter glue, I outlined the heart for some extra pizzazz.


I plan to include a banner on the bottom section of each page and may think of some additional embellishments before it is all done. I need to get these done in the next couple of weeks and mailed to the host.

Thanks for looking!

Gale C. Lewis

Wednesday, January 4, 2012

Paris Challenge at OWSE

The ladies over at Outlaw Women Scrapbook Emporium have issued a challenge for the first half of January-- any project with a Paris theme.  Here is the item I am submitting.                                                 I used a 6x6 chipboard page as the base and covered it with an image of a street map of Paris that I found online. Using a Tim Holtz stamp I heat embossed the Eiffel Tower with black embossing powder.   I found a vintage label from Graphics Fairy (along with the lady image) and colored it with some vintage photo distress stain.     I stamped with the Tim Holtz Postmark in Pine Needles and also Vintage Photo. I stamped a butterfly with the same pink ink as the word "Paris" and then embossed it with white. I wanted more pink in the butterfly, so I stamped again over the white with pink. I finished off the butterfly with some pearl stickers in bright green.

   These letters are grungeboard from a packet I received for Christmas from my parents. I inked them with hot pink embossing ink and then embossed them with clear UTEE.  After I glued them onto the background, I attempted to add a little more embossing to help them really shine. UTEE is more difficult for me to get to stick to the embossing ink. I can tell that soon I will be buying some finer clear powder.


The vintage French lady image is embossed in clear UTEE and then I stamped a Tim Holtz frame around her, embossed with gold.
This was a fun project to make, looking through the stamps I already had on hand and then adding some vintage images found online to create this scene. It was the first time I used Grungeboard letters and I have to say that I like them. I have a couple of packs and I don't think I am going to have to cut letters by hand for some time to come.

Gale C. Lewis

Sunday, January 1, 2012

Adventures in Heat Embossing


I got my first heat gun from my parents for Christmas (along with a couple of great Sizzix Dies.) I have been reluctant to try heat embossing before now, mostly because I was afraid of messing up and maybe catching the house on fire!

Here are some tags I have made playing around with different techniques and using different ways of coloring the images. I am previewing ideas for my Valentine pages swap on the All Things Tim Group.

This tag was colored with Colorwash Sprays by Adirondack along with some Perfect Pearl sprays. The moths were stamped with embossing ink and then heat embossed with bright red Ranger embossing powder.  I found out with the last moth, that if you heat it too long, smoke comes up and the color is no longer as shiny. Like I said, these are experiments.


Using another tag colored in the previously mentioned way, I stamped all these images using embossing ink and then heat embossed them. The black is a fine embossing powder from Ranger. These are all Tim Holtz stamps.

This tag was dry embossed using the script folder. Then I rubbed the embossing pad over the raised areas and embossed with clear UTEE. Over that I applied Spun Sugar Distress Stain. The hearts are just resting on top of this tag. They were made by stamping first red, then embossing ink and embossing with several layers of Clear UTEE. Then I cut them out to use as embellishments.

It has been fun trying out this new to me technique of heat embossing. I am a little worried that my embossing pad is not going to last long at this rate. Luckily, I see that refills are not that expensive.

Off to Michaels today to enjoy a 40% off coupon and then tomorrow it is back to work.

Gale C. Lewis

Saturday, December 31, 2011

Happy New Year!

Happy New Year! To celebrate the beginning of 2012 I am giving my blog a facelift! 

It has been a while since I posted on this blog. I have still been making things, just not sewing at the present time. Mostly these days I make things with paper, ink, stamps and other messy materials.

I am a member of a couple of online crafting groups and many of the participants in these groups have blogs where they display and describe the wonderful things they make from paper. I intend to post more often in the New Year and to share my creations with anyone who might be interested in them.

Hope 2012 is full of fabulous opportunities to create and enjoy life!


Gale