Sunday, May 24, 2009

Beach Photos

We watched surfers, we sat in the sun, we played in the cold surf, we demolished one cheap frisbee, we got sand in every crevice. A good time was had by all.


Saturday, May 23, 2009

No Crafting Today--Gone to the Shore!

Memorial Day Weekend, 2009

Got up at 5:15 this morning to pack the car, get ice and cooler drinks and head to Stacey's to pick up her and Merle. We hit the road around 6:45 and we were parking at First Landing State Park at noon. This after taking the scenic route through Petersburg instead of going through Colonial Heights as planned. Need to get that GPS soon!

After 3.5 hours at the beach, we headed to our room at the Red Roof Inn, a dog friendly establishment. We are in the dog wing at the back of the hotel and have so far seen another schnauzer, a cocker spaniel, and several other breeds. We have heard some barking from adjacent rooms, but not loud enough to disturb. The main thing that is bothersome is when Merle and Conner sound the alarm that someone is walking by on the side walk.

They were good enough to let us run out for a take out dinner from a restaurant we discovered last July when we came to the beach for 4th of July. The Dockside has a bar and restaurant, fishing boat charters, sightseeing tours, a fish cleaning and bait center and some souvenirs. We went on their Fireworks cruise last year and it was fabulous.

Going to bed earlier than 11:00 tonight!

Thursday, May 21, 2009

Redbirds in the Bower Wall Art


This wall hanging is a quilted cheater panel called Redbird in the Bowers by Kathy Schmidt. It is too dark to decorate with this time of year, but I love the primitive folk art illustrations in each section. I machine quilted it and then embellished with some buttons.
For a backing fabric I used a soft cream colored sheet with roses which I obtained from the Goodwill. Other bloggers have mentioned that they use sheets to sew some of their projects. Last time I went to Goodwill I found some great sheets in good condition to cut up and use for backing fabric. There is no longer anywhere in the town in which I work to buy fabric, and I was feeling desperate one day for some backing fabric to use on some panels that had come in the mail the day before. That is what drove me to buying the sheets from the Goodwill. Normally that is not a source I would use for cotton quilting fabric. You cannot beat the price--$2 per sheet for several yards of fabric.

Fresh Tulip Wall Hanging


I love this cheater panel so much I had to buy another one. Which may indeed lead to a third purchase because my sister wants one too. It has all the things I love about the coming of warmer weather-- flowers, butterflies, birds, vibrant colors. This panel has lots of "blocks" of different color and design. It was fun to stitch around all these "blocks" to make them look pieced.
I sandwiched the layers, stitched around three sides and turned it right sides out. Doing this allows me to do without a binding strip.After machine quilting most of the top I stitched the remaining side and finished the quilting. Once I run this through the washing machine, the wrinkles will disappear and it will be ready to go to its lucky recipient.
This fabric is from the Fresh line by Deb Strain for Moda. I have enjoyed surfing the 'net and finding these wonderful cheater panels. The best thing about them is the quick completion time--almost instant gratification. I have several more waiting to be sewn and a list of others to buy when they are available.

Disappearing 9 Patch


Here is a small quilt made from a charm pack of Charisma by Chez Moi for Moda. The pattern I found on this blog is called the Disappearing 9 Patch. Basically, you sew 9 patch blocks (some of the easiest to sew blocks of all) and then chop them up, rearrange them and sew them back together. The result is decidedly not your typical boring 9 patch quilt. I used 36 of the 5 inch charms to make this 4 block lap/doll quilt. It is roughly 45 inches per side, minus seam allowances.
I pieced the four blocks and then put together the quilt by making a "sandwich." The bottom layer was the quilt batting and then I placed the top right sides up. The top layer was the backing fabric face down on the quilt top. I trimmed the batting and the backing fabric to be very close in size to the top and pinned it all together. I sewed around 3 sides making sure to catch all three layers in the seam. (I did have to repair one area where the batting was showing through after I turned it.) I turned the quilt right sides out and repinned it to make it smooth enough to quilt. Then I machine quilted down the seams to make it look more dimensional. I left the bottom open until almost all the top was quilted. Then I trimmed more of the batting away, turned under the last unfinished side and pinned it securely. I topstitched the last side closed and finished the machine quilting.

What I find very interesting about this pattern is that depending on what your 9 patch squares look like, you can vary the look of the pattern. Since the charm pack has all different squares of fabric, my quilt is very "scrappy" looking. If you use traditional color choices for a 9 patch, you get a distinctive pattern after you quarter the blocks and resew them. Here are some examples from Google Images.

I will definitely try this pattern again with a larger end result. I only had one charm pack of this particular fabric. Don't know who is getting this one yet.

What I Have Been Making


I got a new sewing machine at Easter and have switched over from working with wool to working with cotton. I have made several projects since my last crafting post.

The fruit ladies fabric has been made into a beach bag. I have enough fabric for 2 bags, but have only made one so far. In the photo it looks pretty floppy and it is true that I did not use any interfacing or batting to give it stiffness. I figure that once it is filled with beach towels, books, sunscreen and dog treats the shape will be okay.
I used these directions to help me create this bag. The denim straps and bottom came from a pair of $1 jeans from the Goodwill. I broke a needle making the straps because I thought I had put in a heavy weight needle and it was not. Breaking a needle while sewing is pretty scary. Luckily there was no bleeding. Once I got the correct needle in the machine, the denim was not a problem at all.
More finished projects after I let Conner outside. He is "ooffing" at me to get off the computer.

The School Year is Ending--Finally!


Whew! I have four more school days if I count the teacher workday at the end. This time of year is so tiring and stressful. Most of the last 2 weeks I have been assisting with Standards of Learning Tests for 3rd and 4th graders. Everyone's nerves are frayed and ragged. The bright spot is that I have a three day weekend coming up.

My sister and I are going to VA Beach with two of our dogs--my Schnauzer and her Australian Cattle Dog. Conner has been to the beach many times and he could really care less. I take him because I do not want to be away from him. Merle has never been to the beach, but if the way he enjoys his fish pond and trips to the river is any indication, he is in for the time of his life.
The weather is going to be pretty warm for this time of year--80 degrees. Stacey would prefer it to be hotter if she is going in the water. I am sure we are in for a good time.

Tuesday, May 5, 2009

Cheater Quilt Panels

I am not a skilled seamstress. I sometimes have trouble sewing a straight line. The fact that many fabric design lines include cheater panels is a bonus for me. Cheater panels are blocks of designs printed all ready to sew into a quick and easy project. Some quilters use the panel as the center block and add pieced blocks to make it large enough for a bed.


Here is a cheater panel door hanging (or wallhanging) I made from a springy panel with a garden theme. I am giving it to a special gardener I love.

I am especially proud of the hanging loops I stitched to the top of this piece. I pinned them between the layers and stitched around the outside. When I flipped the layers right side out, the hanging loops were perfect! Yay- another sewing skill accomplished.

Last weekend at the quilt store I purchased a set of panels to make beach bags with Fruity Ladies on them. Several more are on their way to me from ebay. It will be interesting to see how these projects end up--I cannot predict yet.

Birthday Wishes for Stacey!!


Today is my only (younger) sister's birthday-- best wishes to her for a happy year!

My new sewing machine is getting a workout. I have made a raggedy quilt on it using some Tula Pink Charm Packs. I have not measured it exactly, but it is a generous lap quilt size. The front (raggedy) side is pieced with 2 packs of Nest fabrics. The opposite side is sewn with 2 packs of the Flutterby fabric line. I am in love with these fabrics and with the designer. I have a Neptune Charm Pack and some matching yardage that is going to be made into something fabulous--I just don't know what yet.
I added some border bands using some tonal fabrics in complementary colors. The quilt store did not have any yardage from either of these lines. I am finding out that fabrics tend to sell out pretty quickly when a new line is introduced.
Here is a cool thing about the Internet-- you can find images of fabric you love and use them as your desktop background. Now I have lots of favorite fabrics to choose from--but currently my background is this bird hidden in flowers fabric from Tula Pink. It comes in more vibrant colorways, but this one still allows me to see my desktop icons.


Saturday, April 25, 2009

Super Summery Saturday!

So far today I have made a new pillow for the back of my armchair and created a nice place to sit in my yard and enjoy my wireless internet connection.

First, the pillow. My chair is an old-fashioned one with a very low top. So when I sit in it there is nothing to rest the back of my head on and it is uncomfortable on my neck. I was using one of those cushy pillows filled with tiny beads, but the fabric is so stretched out now that the pillow feels flat and provides no support.

The other day when I was roaming the aisles of the newest Joann Fabrics in Richmond, I saw a pillow form in the shape of a small bolster. I picked it up and have been thinking how to best cover it over the last few evenings.

I used the remaining squares from the cherry theme charm pack (which I mis-identified before as oh-cherry-oh. It is actually called recipe for friendship.) I did not have enough squares left so I opened the oh-cherry-oh pack (because I bought both at the quilt store) and used a few of those. The body of the pillowcase is a patchwork of 12 blocks arrayed 4x3 in a rectangle and sewn together to form a tube. For the ends I made 2 squares using 4 of the charm squares each. I cut a piece of paper in a 7 inch square (because the bolster is 6 and a half inches across at the ends.) Then I trimmed the square into a circle. I laid it on top of my patchwork squares and cut the circles that form the ends of the pillowcase.

I slipped the tube I previously made over the pillow form and began to pin the first circle to the end. I sewed up the first end using the blanket stitch and some of my perle cotton stash. Then I flipped it over to the other end and repeated the process. I like the contrast stitching that the perle cotton provides.

Now the yard. I have one lovely tree in my yard. I went out and cleaned off last years lawn chair, dragged it over to the tree and angled it so that I do not have to look at any of my neighbor's houses, the street traffic or the pool hall next door. Then I took my cool beverage, my laptop and my little dog out for a spell in the yard. I have a wireless set up called Windy31 and it worked great outside!


I predict there will be many more moments spent in the shade.

Tuesday, April 21, 2009

Pretty Headbands All In a Row!


These headbands are made with the felted wool flowers I made recently. I got some headbands from a local store and covered them with the same wool that comprises the flowers. Then I tacked on the flowers with a few hidden stitches. I think that the wool around the base headband makes it stay on your head better. I always have trouble with headbands slipping off.

I have listed these on my Etsy store for $7 each.

Can any one guess what I rolled up in the background fabric in order to display the headbands? It is something every household has.


Sunday, April 19, 2009

Charm Pack Door Hanging


The new sewing machine came--it sews like butter! There are some nice features that I will post about later.

I went to Joanne Fabrics and a nice quilt store in Richmond to get fabrics and threads. I found some charm packs- which are five inch squares of coordinating fabrics, pre-cut and ready to sew. Each square is one fabric from a collection that a designer puts together.

I got one pack that featured cherry prints in various colors. It looks so cheerful and springy. I made a wall hanging for my front door.

I sewed together 8 of the blocks and then got out my Sizzix machine. I used some of the other squares and ran them through my BigKick to cut graduated circles. I stacked up the circles and machine embroidered them together. Then I found some red wool and ran that through the Sizzix to cut out a large flower shape. I arranged these flowers and the extra circles to suit me and then hand sewed them on using the blanket stitch.

Another thing that I found at Joanne's is a bias tape maker. You cut the strips and feed them through. They come out the other side folded and you hit them with the steam iron to press the creases in. I made some binding tape using the same fabric that I backed the wall hanging with. I sewed it on the back with the machine and then hand stitched the binding on the front side to finish it off. It looks pretty good, I think.

I still need to work out a hanger for it so I can put it on my front door.


Wednesday, April 15, 2009

Getting a New Sewing Machine


A new sewing machine is on its way to me. It's a Brother 60-Stitch Computerized Sewing Machine, model C-6000i. I read a good many favorable reviews for this machine and it will accomplish all the basic sewing that I might do on it. It even has features to allow some free stitch quilting, which I would like to try.

I have been making do with my grandmother's portable Singer machine. It is going to the sewing machine repairman for a tune up. I am not going to get rid of it, but will keep it as a back up and to share with my sister if she has need of it. Our grandmother sewed lots of quilts for the family on this machine and it is the one she taught me to sew on as a youngster. It has untold sentimental value if not any real monetary value.
What will I sew with the new machine? Purses, lap quilts, applique projects and who knows what else?

New Projects

I am halfway through a rainy Spring Break and last night I realized that it has been days since I did any stitching. No wonder I am feeling crabby!

I went back to the wool room and pulled out some felted sweater scraps, then went through a pile of hand dyed wool off the bolt and chose some colors for making flowers. A while back I got a new die for my Sizzix Bigkick machine and I had not tried it out yet. It is for making layers of flower petals that you stack and assemble.

After lots of cranking I had a largish pile of flower parts ready to assemble. I spread them out on my lap desk and began putting together color combinations. Here are my flowers just pinned together.


This morning I went through my bead stash to find some round beads to use as flower centers. I sewed about half of the flowers together using thread and the beads I found. I need to get some more beads in colors that go with the remaining flowers.

I will probably make pins from some of these flowers. I am not sure about the rest.
I just love the look of the blossoms made from the soft wool! I have some black/white plaid wool that I may overdye and make some more in other colors. Some of these may end up on ETSY.
While looking through some blogs this morning I came across these directions for making a key fob with ribbon. I saw some of these in a local bridal shop (where I was looking for ribbon, not bridal wear). I may try to make these using felted wool instead of the cotton webbing the directions call for. Stay tuned for updates.
The weather should be clearing up soon, I hope.

Tuesday, April 14, 2009

Bunnies Going to California


These 2 wool penny rugs are making their way across the country to a lady in California. I hope she enjoys them as much as I did making them. Hoppy Trails, Bunnies!


Sunday, April 12, 2009

Happy Easter to All!


To celebrate Easter I am working on my craft/computer room. This morning I put together a cube shelf for extra storage of craft supplies. I got the idea to spruce it up a little by adding some colorful scrapbook papers to the backing squares. It is so nice looking empty, although I am aware that soon the shelves will likely be filled. When I go to pull out a bin of supplies, I will get a flash of spring pattern.


As a child I fondly remember our Easter traditions-- going to Leggett's with Grandi to pick out and purchase Easter dresses, dyeing Easter eggs on the kitchen table, the egg hunt before Easter dinner, my brother's perennial efforts to look out the windows while the grown ups were hiding eggs, hunting for eggs in clumps of daffodils, stumps and under shrubs in the yard, and my favorite of all, Aunt Rubie's Candy Eggs.


Aunt Rubie was a maiden great aunt, never married, no children of her own and she made it her passion to distribute many gifts to the children in the family. She hand-made most of the gifts using crochet or other needlecrafting techniques. My brother and sister and I still have some of the things she made for us.


At Easter she always made a point of giving each of us big chocolate covered buttercream eggs with frosting flowers on top. They were not made by her, but they were wonderful!! Recently these eggs are being hand made in our area of Virginia by local Mennonite bakers and sold as Easter treats. My sister got one for me for Easter and I have sampled it. Each bite makes me think of Aunt Rubie. Here is a picture of her holding me as an infant.


Sunday, April 5, 2009

One Cargo Pocket Skirt, Two Purses


This weekend while yardsaling, I came across a ladies Union Bay Khaki Cargo skirt. The bottom half of the skirt zips off to make it shorter. I was inspired by Betz White's blog entry about the field bags she makes for her sons using outgrown cargo pants. So I set about planning how to convert this convert-able skirt into two purses.

I unzipped the 2 halves and used my old as the hills Singer sewing machine to sew up the bottom of the skirt. However, I had in mind that I wanted to make a flat bottom and didn't know how. One Google search later and I found these directions shared by Sew, Mama, Sew.
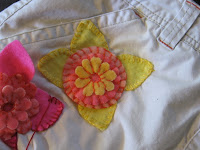
I whipped up a few felt flowers from my bag of flower cut outs and hand sewed them across the front of the bag. This turned out to be the most difficult part. The layers of cotton twill were extremely difficult to get the needle threaded with perle cotton through and I had to find a rubber grip thimble to help with the process. Even so, my fingers are hurting. I persisted though, because the purse was looking very vanilla plain without some embellishments. All that is left for this first purse is to add handles made of ribbon.

I sewed up the top of the other half of the skirt. The hem features an elastic bungee-type cord with clips that I thought would make a good top of the purse. I drew in the elastic cord and the two ends will be a great place for attaching the handles. I may not do any additional embellishment on the second purse other than to add some colorful ribbon handles.

Saturday, April 4, 2009

MMMM, Woolly Goodness!


Here are my thrift store/yard sale wool treasures. I spent part of the morning ripping these skirts and pants along seamlines and preparing the wool to be felted. I cut off buttons, take out hems, remove zippers, etc. before putting them in the wash.
I will wash like colors together to prevent bleeding of colors. I prefer to felt in the washer using regular detergent, hot wash and cold rinse cycles. Then I dry them on high in my dryer.
I will probably overdye the herringbones and tweeds with some of my more colorful Wilton dyes. The textures come out great that way. I prefer to do that overdyeing after the felting process. I know others who do it differently.
Who knows what these treasures will become! I am a little worried that I will have slim pickings in the thrift stores now since it is spring here, so I am stocking up while I can.

Wool Bunny Pins

Here are some more bunny pins. I just love how these are coming out with the different wools. The brown fabric in the photo on the right got very fuzzy and heathery after I felted it in the washer and dryer. I also found some nice springy scrapbook papers at Michael's (and I used my 50 percent off coupon.)

If you go to the Michael's website and register they will send you the ads and weekly coupons via email-- so there is no reason to rush out on Sunday looking for a paper. Also, if you live or work near a Michael's you can print many coupons and use one per day if you like. For fun, I sometimes print extra and pass them out in the store.

My Pets