.JPG)
.JPG)
I am calling this quilt "Pieces of Eight." It is a Chinese Coin Quilt with the "coins" grouped in eights. Then I added 5 inch borders all the way around. The name is inspired by my current infatuation with Pirates (I mean the pirates of old--not nasty machine gun toting pirates of today.)
I used the quilt as you go method for this quilt to see if I could do a better job with the machine quilting with less bulk under the harp of the sewing machine. Using a high contrast pink thread for the quilting allowed me to see how my stippling design was turning out. I experimented with different types of swirls and whorls. The eight pieces in the center of each block were done separately to help them stand out in the design.
So, usually the quilt as you go method calls for you to sew the quilted blocks together with the seam revealed to the backing. Then the seams on the back are trimmed and covered to hide them. However, I chose to have the seams revealed to the front because I like the smooth feel of a backing with no extra bumps or seams. I will have my work cut out for me to conceal the seams from the front without botching the design of the quilt. Right now I am trying to decide if I should use more of the white on white fabric that surrounds each group of eight coins or if I should use some hot pink for both the center seams and the binding. I am leaning toward the hot pink.
The backing for this quilt is a vintage sheet from a thrift store. I chose it both for its incredible softness and also for its busy design. Busy designs are more forgiving when being cut up and pieced back together.
Here's the math: I used a Tula Pink Nest Jelly Roll and cut 2 five inch pieces off each of the 40 strips. That made 80 2.5 x 5 inch rectangles. When I pieced 8 of them together that made 10 blocks. As you can see from the pictures, this lap sized quilt only uses 9 completed blocks.
What happened to the tenth block, you ask? It will be finished by itself and probably sent off to a swap partner in a small quilt swap on SwapBot.
More on this project when it is finished!

.JPG)
.JPG)
.JPG)
.JPG)
.JPG)

.JPG)
.JPG)
.JPG)

.JPG)
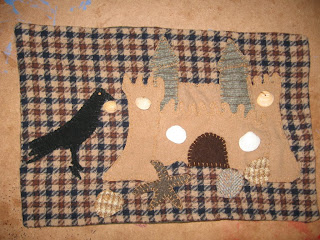
.JPG) When the stitching is finished I have a nice nap mat for a cat or dog. I have an older cat who cannot groom himself as well as he used to. These mats protect my furniture from his accidental messes. The mats can be used in the car, in your pet's sleeping crate, at the foot of your bed in your pet's favorite lounging spot or as a security blanket when you need to board your pet at a kennel.
When the stitching is finished I have a nice nap mat for a cat or dog. I have an older cat who cannot groom himself as well as he used to. These mats protect my furniture from his accidental messes. The mats can be used in the car, in your pet's sleeping crate, at the foot of your bed in your pet's favorite lounging spot or as a security blanket when you need to board your pet at a kennel. 
.JPG)
.JPG)

.JPG)

.JPG)
.JPG)
.JPG)

.JPG)
.JPG)

.JPG)
.JPG)
.JPG)